Zangobob's Blow Torch Heaven
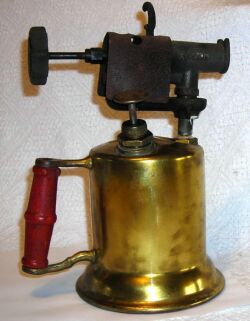 |
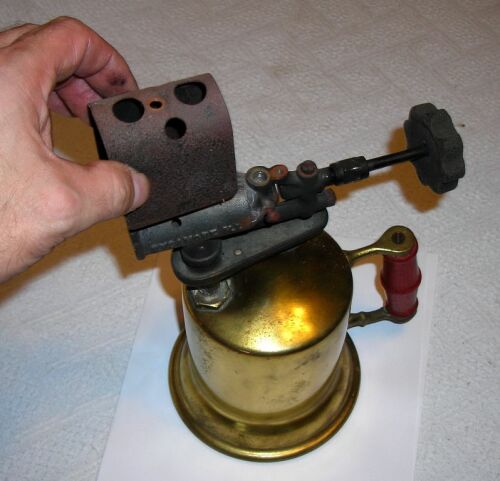
A fully assembled Turner Model 206AA blowtorch is shown in the
picture at the right. Not all blowtorches have the windscreen over the orifice
assembly as this one does. It is very difficult to prime the blowtorch properly
without the wind screen. This is because the slightest bit of wind turbulence
can disturb the priming flame and thus, the burner will not be warmed up to
operating temperature. Many antique blowtorches are missing their windscreen
for one reason or another.
|
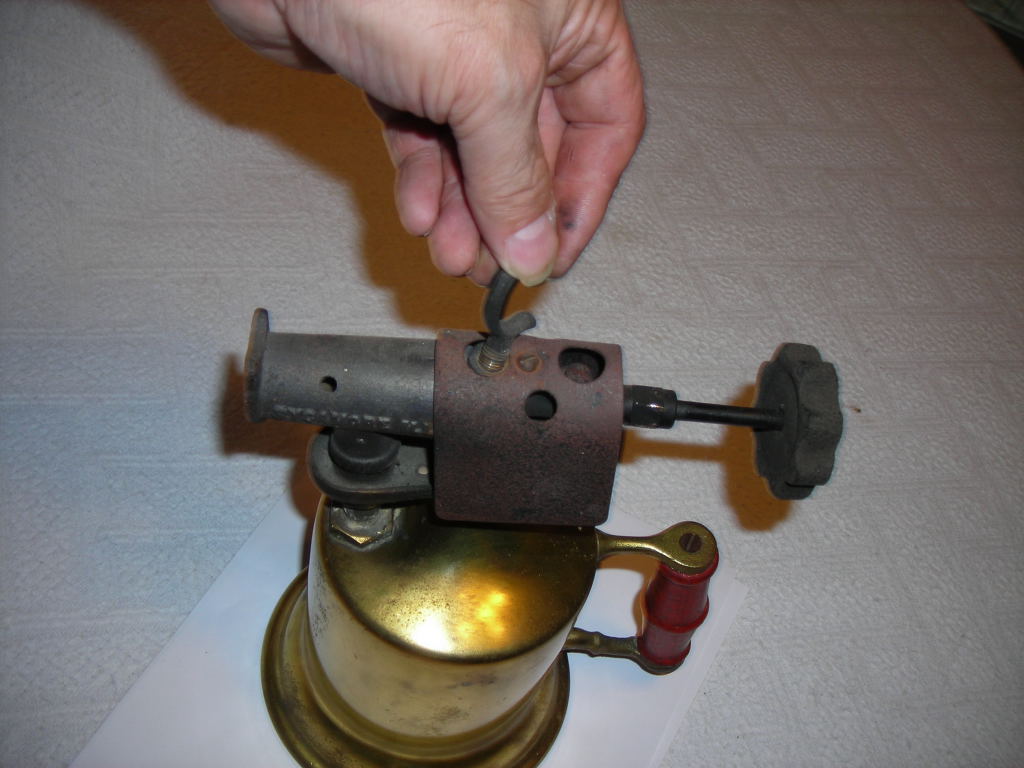
The windscreen can easily be removed from the blowtorch; it is removed by first
removing the hook. This is true with nearly all blowtorches, but not all torches have
a hook. One of our lab specialists has a theory that girl torches do not have
hooks, but boy torches do. We have applied for a federal grant to pay for a
research project to investigate this theory. It is appropriate to mention that
working with blowtorches is not a clean activity, especially when you are doing
repair work. Be prepared to get very dirty.
Most of the dirt particles are actually carbon from the burned fuel. Carbon has a
way of burrowing itself into the skin and it is difficult to wash off. It would
probably be helpful to wear gloves that are appropriate for handling little
parts.
Typical gloves do not lend themselves well for intricate work. However, Latex
gloves work fairly well, but they tend to get damaged easily. This is true
especially when disassembling a blowtorch; do what works the best for you.
Working without gloves
is certainly easier. You can see from the picture that our model has gotten
noticably dirty in the beginning stage of removing the hook. Believe it or not, our
model actually took a shower before these pictures were taken. We are told that he
even changed his underwear. In any case, Zangobob's Blow Torch Heaven strongly
suggests that you do not do any blowtorch work if you have a hot (no pun intended) date
lined up for that nite. You will make a very bad impression if you cannot wash all
of that carbon off your hands. Obviously this is not a serious problem if your
date is a torch collector too. Please do not write to us asking about the
availability of single, unattached people that are blowtorch collectors! We do not
belong to the proper labor union for that! BTW, we would be greatful if you told your
date about our hot (OK,OK, pun intended this time) website about blowtorches.
|
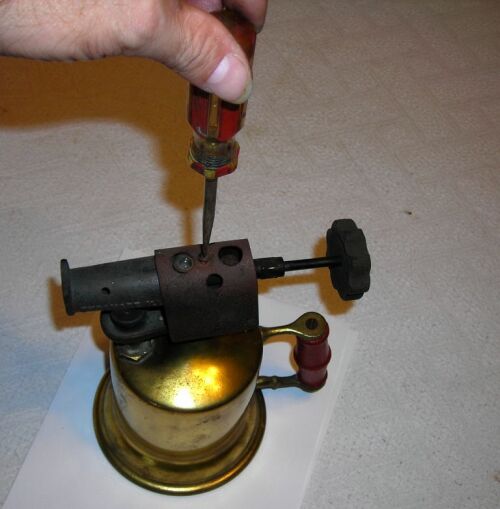
The windscreen is usually held in place with one screw, and it is usually
easy to remove with the appropriately sized flat-blade screwdriver. The screw
can be frozen in place in some cases, and will require some heat to allow it
to be removed. Do not force the screw to come out; doing so will cause the
screw to break.
|
 |
The windscreen can be easily lifted off the burner head once the
retaining screw is removed. It might be required to spread the screen apart
slightly so that it will clear all parts of the burner assembly.
|
 |
Lift the windscreen off the burner assembly and set it in
a safe place for eventual reassembly
|
 |
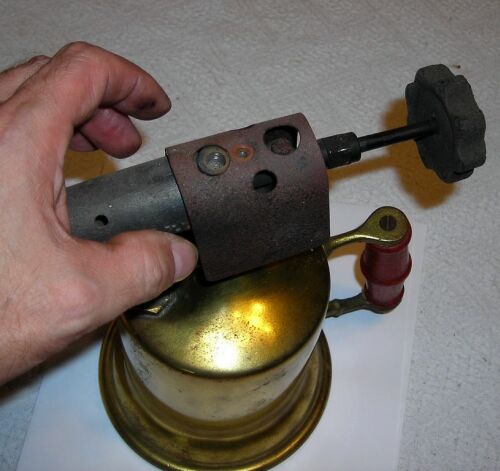
The Turner 206AA burner assembly is a great example for viewing the
essential components used therein. This is because the Orifice, undervein
and fuel flow control system. It is difficult to see the orifice and the
fuel mixture systems used by these other burner assemblies.
The 206AA allows the orifice block to be easily seen; the orifice
block looks in the photo as a large hex head. This kind of design makes
its replacement very convenient. Orifices are not usually replaceable
items in the torches of later production. This change was done to help
reduce manufacturing costs.
The consequence of this manufacturing change is that the entire burner
head assembly must be replaced if the orifice ever goes bad. Although
difficult to see in the picture, just to the left of the orifice block is
a small cylinder protruding into the burner chamber, that is held in place
by a screw that is approximately the same size as the screw that holds the
windscreen in place. The position of this cylinder relative to the orifice
block allows a means to modify the fuel/air mixture. The closer the
cylinder is to the orifice block, the less will be the quantity of air
that can be mixed with the fuel.
|
This web site has more information about disassembly and repair of a
blowtorch. Click on the link below to go to our torch disassembly page.
You can see how the various parts fit together my mousing over the picture and
clicking on the area of interest. The most technical details can be accessed by
clicking on the pump or the burner head. There are cursory descriptions for other
parts of the torch. Click toward the bottom of the tank to see what the torch
looks like when it is tipped over. You will see the fill plug from this
perspective.
More disassembly details!